
I love bananas and I love Nutella and combining the two leads to sheer magic. While it is very difficult to imagine improving on Nutella, when you combine it with fresh cream, butter and icing sugar, and then spread this frosting atop a moist cake chock full of bananas and walnuts, the blend of flavours is simply mouth-watering. Continue reading “Banana cake with a nutella twist”
 |
| My mom’s basbousa recipe below:) |
Eid al-Fitr, the celebration that marks the end of the Islamic month of fasting, is all about consuming sweets. Well, at least that’s what I grew up believing –and I have happily upheld this tradition up to today. After a month of fasting from sunrise until sunset, which tends to constrict your appetite, pastries, sweets and cookies are served up in large quantities during the three days of Eid al-Fitr (the festival of breaking the fast). The best part is, after cutting down consumption during Ramadan, I don’t feel guilty about devouring these rich, sweet, buttery desserts.
There are so many varieties of sweets served across the Arab world during Eid. Kahk (or maamoul) is a particular favourite in Egypt and other countries: small pastries stuffed with dates, walnuts or pistachios and doused in powdered sugar. Ghorayebah biscuits, baklava and kunafeh (a Middle Eastern pastry made from a vermicelli-like pastry) are other crowd favourites.
During Eid, extended family members generally visit one another to congratulate each other on a successful Ramadan and pass along Eid greetings. These sweets, often bought at bakeries, will be served as part of the celebrations.
Apart from my sister, I haven’t any family or extended family in town this year. Hence, we have no major socialising events to attend. I suppose because of this, it slipped my mind to stock up on pastries at the end of Ramadan. I woke up this morning realising there wasn’t a traditional sweet in the house to help us celebrate.
So I pulled out my handy compilation of mom’s dessert recipes and decided to make basbousa, a sweet pastry made from semolina and coconut and drizzled in syrup. While I have had this recipe on file for years, today was the first time I tried to make it on my own.
The basbousa turned out quite well (I ate two portions before dinner). As usually occurs when I try one of my mom’s recipes, however, the basbousa wasn’t quite the same as when she makes it. This never fails. I can follow my mom’s main course or dessert recipes to a tee and yet they will always turn out a little off, as though her touch triggers a latent flavour in every dish that cannot be replicated by anyone else.
In any case, the basbousa is still yummy enough to share, so I’ve included the recipe below for those interested in indulging in some guilt-free dessert consumption this Eid.

While Ramadan is over, many Muslims will continue to fast with less frequency in Shawwal, the lunar month that follows Ramadan on the Islamic calendar. Eid is declared once the sighting of a new moon marks the start of Shawwal. There are said to be spiritual benefits for fasting six days during the month of Shawwal, following the Eid celebration. Fasting outside of Ramadan is one way to help carry the spirit of the month through the year, which I elaborated on in July in my blog entry, ‘Fasting to Feed the Soul’.
A joyous Eid to all and happy eating!

My mom’s basbousa
Ingredients
Cake
1 cup all-purpose flour
1 cup wheatlets (semolina)
1 cup coconut
3 teaspoons baking powder
½ cup butter or margarine, melted
¼ cup to ½ cup yogurt
Syrup
1 cup water
2 cups sugar
1 teaspoon vanilla powder
Juice from ¼ of a lemon, freshly squeezed
Directions
1) Preheat oven to 180C.
2) Prepare the syrup. Combine sugar, water and vanilla powder in a saucepan at high heat. Bring to a boil and then simmer for five minutes to form a syrup. Leave to cool.
3) Mix together flour, wheatlets, coconut and baking powder in medium bowl. Fold in butter and mix until well-combined. Add yogurt to mixture and combine until batter is smooth.
4) Spread the mixture into greased large circular or rectangular baking dish and pat down until it is evenly spread across the pan. (I used two square baking dishes this time, but would have preferred making it in one larger pan)
Take a sharp knife and slice cake into diamond or square shapes. Arrange almonds on top so that each cut slice will hold an almond.
5) Bake for about 30 minutes until golden.
6) Remove cake from oven and immediately pour the syrup over the cake while it is still in the baking dish. Allow basbousa to absorb the syrup and cool down before removing from tray and serving.
Enjoy!!
 |
| Remove from the oven once it is golden… |
 |
| Then drench the cake in the prepared syrup.. |
 |
| And leave it until the syrup is completely absorbed. Ready to eat! |
 |
| Berry selection at a farmer’s market in Richmond, British Columbia |
I went blueberry picking this week with my mom for the first time in years. There are numerous berry farms about a ten-minute drive from our house in Richmond, British Columbia. When I was in high school, we were leasing a house not far from where we live now that had three large blueberry bushes in the backyard. I used to spend hours in the summer months collecting the blueberries once they had ripened. We would freeze bags of them in our large deep freezer and pull them out throughout the year to bake muffins and cakes. I also love eating blueberries on their own, either fresh or frozen.
 |
| Me picking blueberries |
The rain and cloudy weather this year has delayed the peak of blueberry season, which usually happens in July. This year, blueberry-picking season is likely to peak in early August, according to the owner of the farm we visited. Nonetheless, we were able to collect about one and a half kilograms of big, plump, sweet berries. How better to enjoy fresh blueberries than in big blueberry muffins? I share a great recipe below.
While we’re on the subject of delicious muffins, I also have to share a fabulous cherry bran muffin recipe that I tried last week after a neighbour gave us a basket full of fresh dark red cherries picked from a tree in his back yard. I replaced raisins with cherries in a recipe I found on Allrecipes.com. The muffins are incredibly soft and moist, and so healthy and delicious. Really great for breakfast.
Enjoy these great summer-time treats!

FRESH BLUEBERRY MUFFINS
Ingredients
- 3 cups all-purpose flour
- 1 cup white sugar
- 1 teaspoon salt
- 4 teaspoons baking powder
- 2/3 cup of vegetable oil
- 2 eggs
- 1 teaspoon of vanilla powder or vanilla extract
- 2/3 cup milk
- 1 1/4 cups fresh blueberries
Optional topping
- 3/4 cup white sugar
- 1/2 cup all-purpose flour
- 1/3 cup butter
- 2 teaspoons ground cinnamon
Directions
PREHEAT oven to 200 degrees C. Line muffin tin with muffin liners.
COMBINE flour, baking powder and salt in a medium bowl.
BEAT butter and sugar in a large mixing bowl until smooth. Combine eggs and vanilla in a small bowl and whisk with a fork. Add egg mixture to butter and sugar and beat until smooth. Add flour mixture to the large bowl and mix well. Add milk and combine until smooth. Fold in blueberries.
To make crumb topping, mix sugar, flour, butter and cinnamon until well-combined.
FILL muffin cups. Sprinkle the mixture over the muffins. For larger muffins, fill the tins to the brim.
Bake for about 20 minutes in oven until done.

———————————————————–
MOIST CHERRY BRAN MUFFINS
Ingredients
- 1 1/2 cups wheat bran
- 1 cup buttermilk
- 1/3 cup vegetable oil
- 1 egg
- 2/3 cup brown sugar
- 1/2 teaspoon vanilla extract
- 1 cup all-purpose flour
- 1 teaspoon baking soda
- 1 teaspoon baking powder
- 1/2 teaspoon salt
- 1 cup diced cherries
Directions
- Preheat oven to 375 degrees F (190 degrees C). Grease muffin cups or line with paper muffin liners.
- Mix together wheat bran and buttermilk; let stand for 10 minutes.
- Beat together oil, egg, sugar and vanilla and add to buttermilk/bran mixture. Sift together flour, baking soda, baking powder and salt. Stir flour mixture into buttermilk mixture, until just blended. Fold in cherries and spoon batter into prepared muffin tins.
- Bake for 20 minutes, or until a toothpick inserted into the centre of a muffin comes out clean.


Just a few days into my summer holiday, and my mom is baking bread for one of our neighbours whose family is visiting Denmark this week. She is always up well before 8 a.m. on these days because baking bread is a several-step process and each one demands time and patience.
 Throughout my life, my mom always baked bread at home: traditional Egyptian white and brown pita bread, bagels, buns and rolls. She was born with a flair for baking; never picking up a cook book yet somehow instinctively knowing how much of each ingredient to use in cakes, cookies and pastries.
When she first moved to Canada from Egypt, mom was troubled to find that most of the bread sold in grocery stores and bakeries contained lard of pig fat, often used as shortening, which Muslims are forbidden from eating. Growing up in a majority Muslim country she never had to concern herself with the ingredients of basic food items like bread. But in Canada, many freshly baked and packaged breads and biscuits contained lard, which she had no intention of starting to consume.
So as a practicing Muslim, she decided to start baking bread at home.
This week, as she knelt over the big plastic mixing basin she has always used to firmly knead together flour, milk, salt and yeast, I asked her how she learned to bake bread. She responded intuitively in Arabic, ‘life taught me ya Daliah’.

My mom often gives that response when she is unable to pin down exactly how events transpired. In this case, it is completely true. She did not learn from any book or person how to bake bread, she just followed her instincts in the kitchen and reacted to the needs of her family. In addition to avoiding store-bought baked goods containing lard, baking at home helped her save a good deal of money as my father finished his university studies and struggled to start his career.

As a child, my mom would watch her mother prepare the dough for traditional Egyptian pita bread. Then she and her sisters would take the uncooked loaves to an open fire-powered oven in the neighbourhood for baking. I suppose watching her mom bake bread somehow sparked her talent, but my mom learned how to bake many varieties of bread all on her own. She often experimented with new varieties using milk instead of water, adding raisins, sesame seeds or spices.
My favourite bread is my mom’s classic brown pita bread made with white and whole wheat flour, which is especially irresistible when drizzled with butter as soon as it comes out of the oven. My mom bakes dozens of loaves at a time and freezes them so they can be consumed for many weeks.
I cannot imagine baking bread myself. The process is quite daunting and requires a great deal of elbow grease and patience. After vigorously kneading together flour, fresh yeast, salt and milk, mom covers the large heap of dough with several thick clothes to allow it to rise.

After about an hour, she takes hand-sized pieces of dough and rolls them into balls, setting them on the counter and covering them for an hour or so until they rise further.

Depending on the type of bread, she will roll out the dough into a flat circular shape if she is baking pita bread. Otherwise, she’ll mould each small mound of dough into rectangular buns or bagels. These are placed in oven pans and then covered again to allow them to rise once more before baking.
The scent of freshly baked bread is something that consistently reminds me of home, which is why waking up to find my mom diligently kneading dough this week was a delight because I haven’t been to our home in Canada for two years. When she visits me or my sisters she doesn’t bake bread; it is one of her routines only when she is in her kitchen.

This week she made her delicious white buns kneaded with milk to make them fluffy and rich. As soon as the first batch was ready, mom filled a basket with fresh rolls direct out of the oven and took them over to a neighbour’s home for his family visiting from Europe, along with a basket of fruit and a cake baked with fresh local strawberries.
My mom is one of those neighbours who would lend you her heart if you asked. She loves baking and sharing, happy to receive only a smile of gratitude in return.

These days, there are many varieties of bread available in grocery stores made from vegetable or beef shortening rather than lard. But mom has become accustomed to baking her own bread.
We don’t mind, her bread is distinctive and delicious. Luckily this week, after sharing bread with a few neighbours, there were plenty of buns left over for the two of us. Nice to be home.


There are certain tastes, scents and sounds that will take you back to another time in your life. Me and my sweet tooth will always remember a delightful pastry.
I baked a dessert this weekend that took me right back to my junior high home economics class in Calgary, Canada. Our class was tasked with baking finger food for an evening assembly, and we made these mouth-watering moist pumpkin cookies filled with a creamy icing. At the time, I think they were about the most-delicious sweet I’d ever tasted.
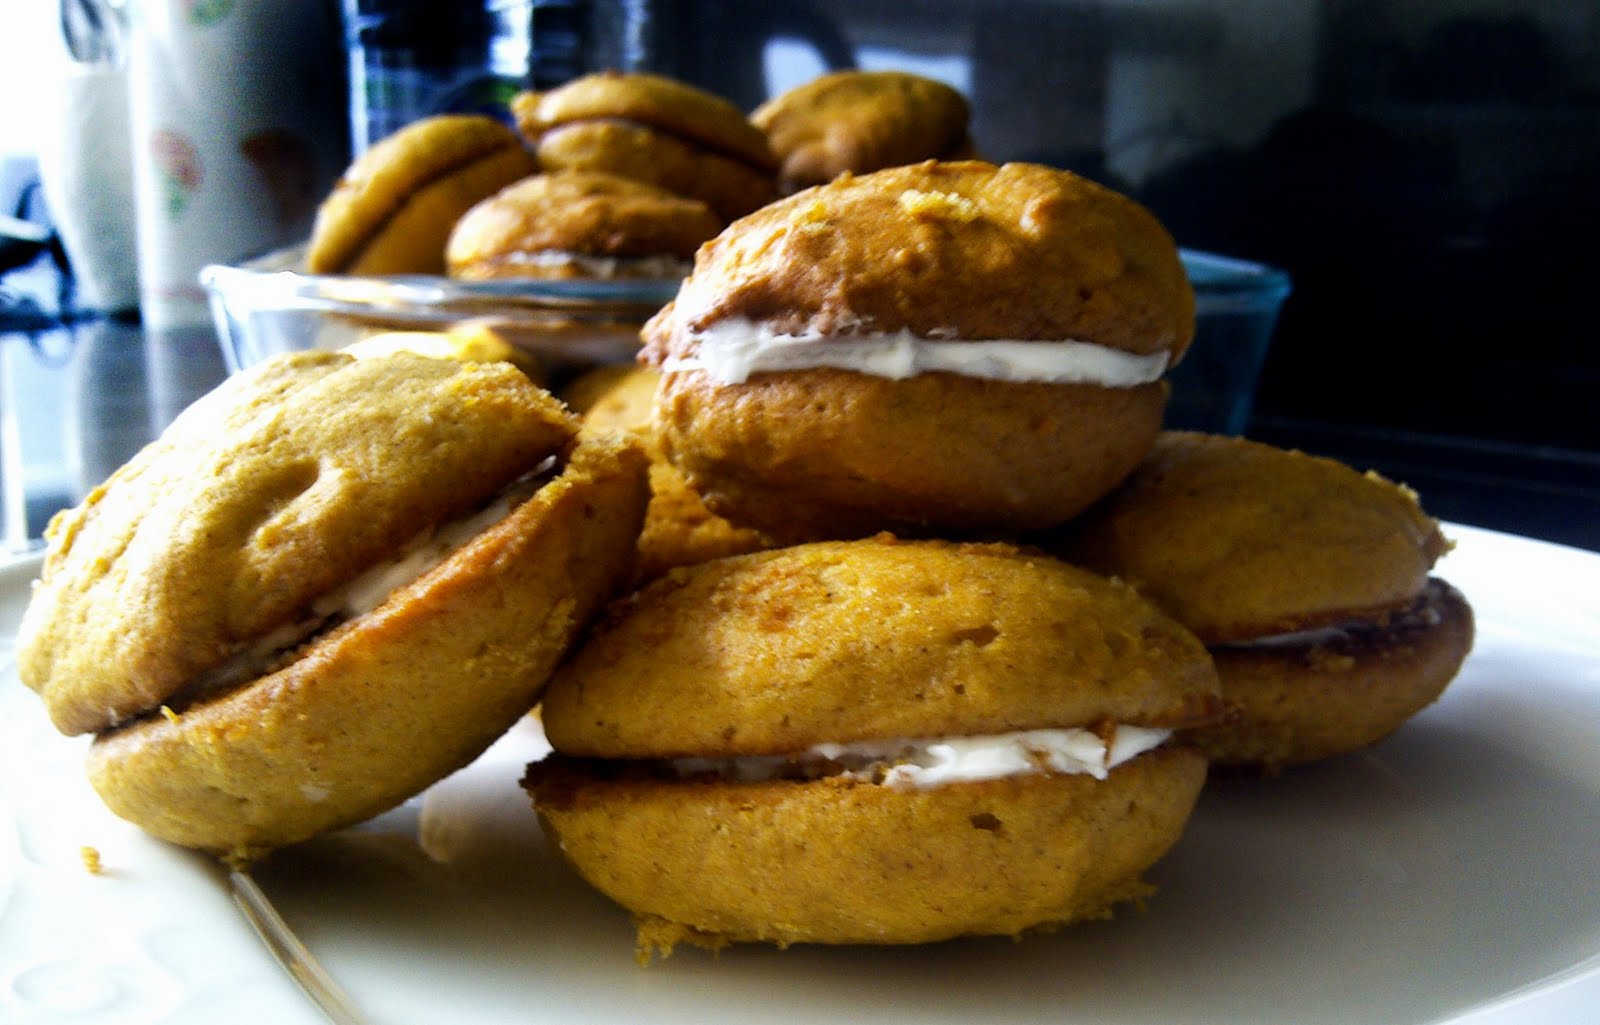 |
| Pumpkin ‘whoopie pie’ cookie sandwich filled with cream cheese icing |
I held onto the recipe for a while, but at some point in the course of moving cities, which we did shortly afterward, I misplaced it and, well, forgot about those cookies. Once in a while I would think about trying to find the recipe, but we didn’t have Google back then to make the search easy.
A few weeks ago, my sister asked me if I remembered those pumpkin cookies from middle school; she had also baked them in home-ec, and turns out she also never quite forgot about them either.
She found a recipe online for ‘mini pumpkin whoppie pies’ – cream cheese icing sandwiched between two very moist mini pumpkin cakes. I’m not sure if these are exactly like the sandwich cookies I had baked middle school, but they’re close and they’re incredibly good, blending pumpkin, cinnamon and ginger flavours.
 |
| These are about double the size they should be but just as yummy! |
She was very excited to bake them for me when I visited her earlier this month, and I thought I would give the recipe a try this weekend. I made them a bit too big (follow the instructions when it says to put only a heaping teaspoon of the batter onto the baking sheet). Definitely worth a try and very easy!
 |
| I love eating and sharing desserts. Recipe makes around 30 cookies. |
The recipe below is from cooks.com, although I modified the icing recipe because the one on the website includes too much butter.
COOKIES:
2 cups all-purpose flour
1 teaspoon baking powder
1 teaspoon baking soda
1 teaspoon ground cinnamon
1/2 teaspoon ground ginger
1/2 teaspoon salt
1/2 cup (1 stick) butter, softened
1 1/4 cups granulated sugar
2 large eggs, at room temperature, lightly beaten
1 cup LIBBY’S® 100% Pure Pumpkin
1 teaspoon vanilla extract
1 teaspoon baking powder
1 teaspoon baking soda
1 teaspoon ground cinnamon
1/2 teaspoon ground ginger
1/2 teaspoon salt
1/2 cup (1 stick) butter, softened
1 1/4 cups granulated sugar
2 large eggs, at room temperature, lightly beaten
1 cup LIBBY’S® 100% Pure Pumpkin
1 teaspoon vanilla extract
PREHEAT oven to 350°F. Lightly grease or line four baking sheets with parchment paper.
COMBINE flour, baking powder, baking soda, cinnamon, ginger and salt in medium bowl. Beat butter and sugar in large mixer bowl on medium speed for 2 minutes. Add eggs, one at a time, beating well after each addition. Add pumpkin and vanilla extract; beat until smooth. Stir in flour mixture until combined.
Drop by heaping measuring teaspoons onto prepared baking sheets. (A total of 72 cookies are needed for the recipe.)
BAKE for 10 to 13 minutes or until springy to the touch. Cool on baking sheets for 5 minutes; remove to wire racks to cool completely.
CREAM CHEESE FILLING:
3 tablespoons cream cheese
2 teaspoons butter, softened
1/2 teaspoon vanilla extract
1 1/2-2 cups powdered sugar
2 teaspoons butter, softened
1/2 teaspoon vanilla extract
1 1/2-2 cups powdered sugar
BEAT cream cheese, butter and vanilla extract in small mixer bowl on medium speed until fluffy. Gradually beat in powdered sugar until light and fluffy.
SPREAD a heaping teaspoon of filling onto flat side of one cookie; top with flat side of second cookie to make a sandwich. Repeat with remaining cookies and filling. Store in covered container in refrigerator.
Estimated Times: Preparation – 20 minutes; Cooking – 10 minutes.
Yields 3 dozen mini pies.
Enjoy!!
>
 Other than for work or grocery shopping, I have barely left home in the past month and a half. Like millions of people of many nationalities glued to their television, Twitter and Facebook feeds, I’ve sought to find ways to support the truly extraordinary popular movements in my native Egypt, Tunisia, Libya, Yemen, Bahrain and elsewhere. This has, naturally, taken a toll on my nerves.
One way of relieving the stress inflicted on me in real time by the images, articles and accounts of severe state-sanctioned brutality against peaceful protesters has been baking – something I have always loved to do in my free time. During the Egyptian revolution, I was trying to perfect a chocolate cake recipe, sharing my trials with friends and neighbours. After several tries, I found the right balance of ingredients for a perfectly delicious, moist and rich chocolate cake on the afternoon of Feb. 11, just a couple of hours before Hosni Mubarak resigned as President of Egypt following three decades of repressive rule. I decided to name the cake “Thawra”, the Arabic term meaning revolution.
Today, two weeks after the fall of Mubarak, I’ve baked it again in honour of the people of Libya. Please find the recipe below, it is easy to make and absolutely scrumptious!

Thawra chocolate cake
Ingredients
Cake
- 1 cup plain flour
- 1 cup white sugar
- 1 teaspoon baking powder
- 1/2 teaspoon baking soda
- Cocoa powder, ½ to ¾ cup depending on your taste
- 75-100g of baking chocolate, broken into small pieces
- ¾ cup margarine
- 2 large eggs
- 2 teaspoons real vanilla extract or vanilla powder
- 200 ml of fresh cream
Frosting
- 1 tablespoon of margarine
- ½ cup of icing sugar
- 75 ml cream
- ½ teaspoon vanilla extract
- 2-3 tablespoons of cocoa
- Grated baking chocolate shavings (optional)
Directions for cake:
Pre-heat oven at 175 degrees Celsius. Grease cake pan (I use a round cake pan with a removable base).
Mix together flour, baking powder and baking soda in a small bowl, and set aside. Break two eggs into a small bowl and using a fork, whip with vanilla extract. In a large bowl, mix together margarine and sugar until mixture is smooth (I don’t have an electric mixer and it turns out perfectly). Fold in egg mixture with the butter and sugar and mix until the texture of the batter is light and smooth.
Then add the fresh cream, which contributes to the cakes velvety taste and texture. Add cocoa and baking chocolate and mix well. Finally, add the flour mixture and blend well.
Place the batter in the pan and bake until a fork pressed in the centre of the cake comes out clean (for me it takes about 40 minutes).
Directions for icing:
Mix together margarine and icing sugar until smooth, then add vanilla and mix in fresh cream one spoon at a time until the texture of the icing is thick and creamy. Add cocoa and chocolate shavings.
Enjoy! Viva la revolution!

